ਜਨਃ . 10, 2025 10:31 Back to list
ਸਲਾਈਡਿੰਗ ਸਕ੍ਰੀਨ ਡੋਰ ਕਿਵੇਂ ਸਥਾਪਿਤ ਕਰਨਾ ਹੈ: ਕਦਮ-ਦਰ-ਕਦਮ ਨਿਰਦੇਸ਼
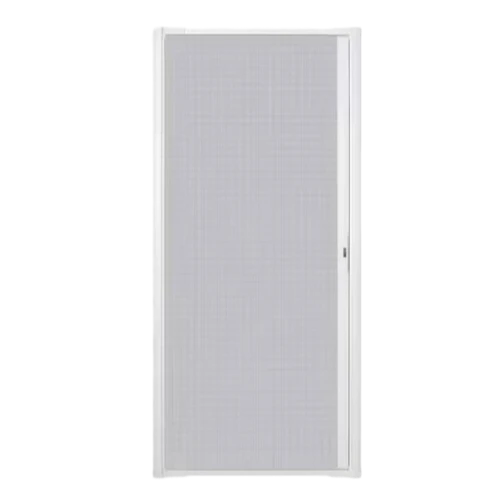
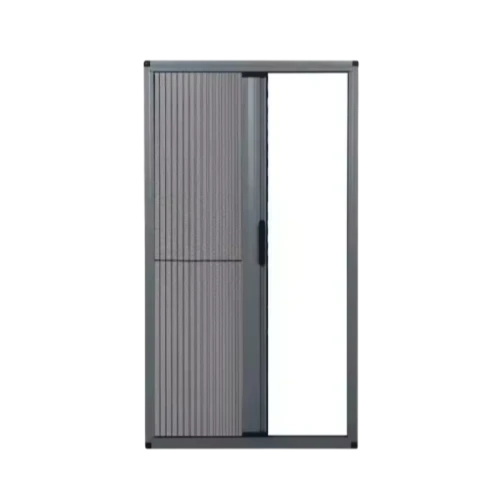
Installing a sliding mesh door is a straightforward process that can enhance your home by allowing fresh air to flow in while keeping insects out. Whether you're looking to replace an old screen or install a brand-new one, this guide will walk you through the process, step-by-step, ensuring that your sliding mesh door installation goes smoothly.
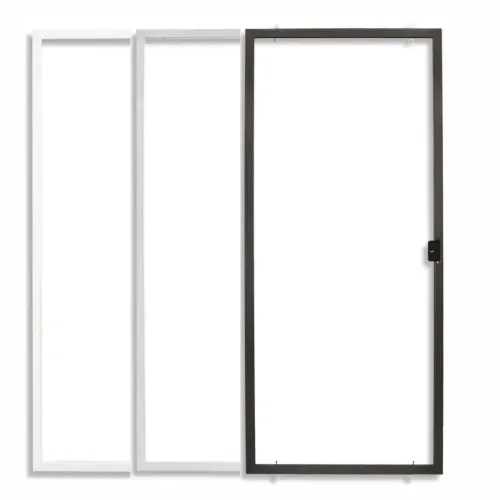
ਲੋੜੀਂਦੇ ਔਜ਼ਾਰ ਅਤੇ ਸਮੱਗਰੀ:
ਸਲਾਈਡਿੰਗ ਸਕ੍ਰੀਨ ਡੋਰ ਕਿੱਟ (ਜਾਂ ਪਹਿਲਾਂ ਤੋਂ ਖਰੀਦਿਆ ਸਕ੍ਰੀਨ ਡੋਰ)
ਫੀਤਾ ਮਾਪ
ਪੇਚਕਾਰੀ
ਉਪਯੋਗੀ ਚਾਕੂ
ਕੈਂਚੀ
ਪੈਨਸਿਲ
ਪੱਧਰ
ਸਿਲੀਕੋਨ ਲੁਬਰੀਕੈਂਟ (ਵਿਕਲਪਿਕ)
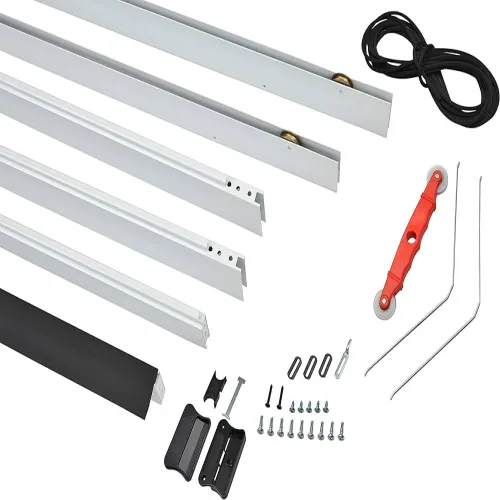
-
1.ਦਰਵਾਜ਼ੇ ਦੇ ਫਰੇਮ ਨੂੰ ਮਾਪੋ
ਆਪਣੇ ਸਲਾਈਡਿੰਗ ਜਾਲੀ ਵਾਲੇ ਦਰਵਾਜ਼ੇ ਨੂੰ ਖਰੀਦਣ ਜਾਂ ਲਗਾਉਣ ਤੋਂ ਪਹਿਲਾਂ, ਤੁਹਾਨੂੰ ਇਹ ਯਕੀਨੀ ਬਣਾਉਣ ਦੀ ਜ਼ਰੂਰਤ ਹੋਏਗੀ ਕਿ ਤੁਹਾਡਾ ਆਕਾਰ ਸਹੀ ਹੈ। ਆਪਣੇ ਦਰਵਾਜ਼ੇ ਦੇ ਫਰੇਮ ਦੀ ਚੌੜਾਈ ਅਤੇ ਉਚਾਈ ਨੂੰ ਮਾਪਣ ਲਈ ਇੱਕ ਟੇਪ ਮਾਪ ਦੀ ਵਰਤੋਂ ਕਰੋ।
Measure the height from the top to the bottom of the frame. Measure the width from one side of the frame to the other.
Take these measurements to the store or check the specifications of the sliding mesh door kit you’re purchasing. It’s crucial that the screen door fits your door frame perfectly for easy installation and optimal performance.
-
2.ਦਰਵਾਜ਼ੇ ਦਾ ਫਰੇਮ ਤਿਆਰ ਕਰੋ
If you’re replacing an old screen door, start by removing the old frame. Use a screwdriver to unscrew any fasteners that are holding the frame in place. If the door frame has any excess debris or dirt, wipe it down with a cloth.
ਦਰਵਾਜ਼ੇ ਦੇ ਫਰੇਮ ਦੀ ਜਾਂਚ ਕਰੋ ਕਿ ਕੀ ਕੋਈ ਨੁਕਸਾਨ ਹੈ, ਜਿਵੇਂ ਕਿ ਤਰੇੜਾਂ ਜਾਂ ਖੁਰਦਰੇ ਕਿਨਾਰਿਆਂ ਦੀ, ਅਤੇ ਇੰਸਟਾਲੇਸ਼ਨ ਸ਼ੁਰੂ ਕਰਨ ਤੋਂ ਪਹਿਲਾਂ ਕੋਈ ਵੀ ਜ਼ਰੂਰੀ ਮੁਰੰਮਤ ਕਰੋ।
-
3.ਟਰੈਕ ਸਥਾਪਤ ਕਰੋ (ਵਿਕਲਪਿਕ)
Some sliding mesh door kits come with a bottom track that needs to be installed separately. This track helps guide the movement of the door.
ਹੇਠਲੇ ਟਰੈਕ ਨੂੰ ਦਰਵਾਜ਼ੇ ਦੇ ਫਰੇਮ ਦੇ ਹੇਠਾਂ ਰੱਖੋ।
ਯਕੀਨੀ ਬਣਾਓ ਕਿ ਇਹ ਦਰਵਾਜ਼ੇ ਦੇ ਫਰੇਮ ਨਾਲ ਬਰਾਬਰ ਇਕਸਾਰ ਹੋਵੇ, ਅਤੇ ਪੇਚਾਂ ਲਈ ਸਥਿਤੀਆਂ 'ਤੇ ਨਿਸ਼ਾਨ ਲਗਾਓ।
ਇੱਕ ਡ੍ਰਿਲ ਦੀ ਵਰਤੋਂ ਕਰਦੇ ਹੋਏ, ਟਰੈਕ ਨੂੰ ਸੁਰੱਖਿਅਤ ਢੰਗ ਨਾਲ ਪੇਚ ਕਰੋ, ਇਹ ਯਕੀਨੀ ਬਣਾਉਂਦੇ ਹੋਏ ਕਿ ਇਹ ਪੱਧਰ 'ਤੇ ਹੈ ਅਤੇ ਸਹੀ ਢੰਗ ਨਾਲ ਇਕਸਾਰ ਹੈ।
-
4.ਪਹੀਏ ਨੂੰ ਸਕ੍ਰੀਨ ਦੇ ਦਰਵਾਜ਼ੇ ਨਾਲ ਜੋੜੋ।
ਬਹੁਤ ਸਾਰੇ ਸਲਾਈਡਿੰਗ ਜਾਲੀ ਵਾਲੇ ਦਰਵਾਜ਼ੇ ਪਹੀਏ (ਜਿਨ੍ਹਾਂ ਨੂੰ ਰੋਲਰ ਵੀ ਕਿਹਾ ਜਾਂਦਾ ਹੈ) ਦੇ ਨਾਲ ਆਉਂਦੇ ਹਨ ਜੋ ਦਰਵਾਜ਼ੇ ਨੂੰ ਸੁਚਾਰੂ ਢੰਗ ਨਾਲ ਸਲਾਈਡ ਕਰਨ ਦਿੰਦੇ ਹਨ। ਇਹਨਾਂ ਨੂੰ ਸਕ੍ਰੀਨ ਦਰਵਾਜ਼ੇ ਦੇ ਉੱਪਰ ਅਤੇ ਹੇਠਾਂ ਲਗਾਇਆ ਜਾਣਾ ਚਾਹੀਦਾ ਹੈ।
ਆਪਣੇ ਸਕ੍ਰੀਨ ਦਰਵਾਜ਼ੇ 'ਤੇ ਰੋਲਰ ਬਰੈਕਟਾਂ ਦਾ ਪਤਾ ਲਗਾਓ।
Attach the wheels to the designated spots on the screen door using screws. Be sure to follow the manufacturer’s instructions, as the placement of the wheels may vary depending on the model.
ਦਰਵਾਜ਼ਾ ਦਰਵਾਜ਼ੇ ਦੇ ਫਰੇਮ ਦੇ ਅੰਦਰ ਚੰਗੀ ਤਰ੍ਹਾਂ ਫਿੱਟ ਹੋਣ ਨੂੰ ਯਕੀਨੀ ਬਣਾਉਣ ਲਈ ਐਡਜਸਟਮੈਂਟ ਪੇਚਾਂ ਦੀ ਵਰਤੋਂ ਕਰਕੇ ਰੋਲਰਾਂ ਦੀ ਉਚਾਈ ਨੂੰ ਐਡਜਸਟ ਕਰੋ।
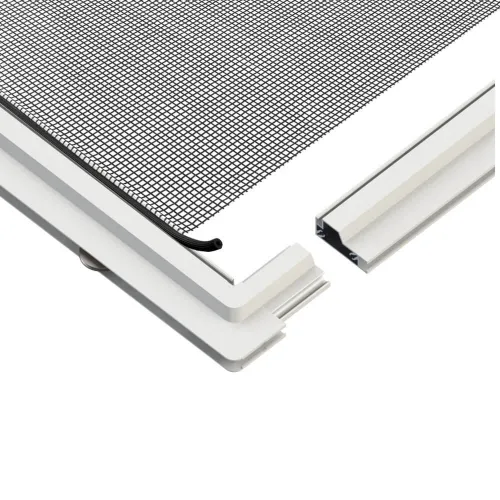
-
5.ਦਰਵਾਜ਼ੇ ਨੂੰ ਫਰੇਮ ਵਿੱਚ ਲਗਾਓ
Now that the wheels are in place, it’s time to install the door into the frame.
ਦਰਵਾਜ਼ੇ ਨੂੰ ਧਿਆਨ ਨਾਲ ਚੁੱਕੋ ਅਤੇ ਇਸਨੂੰ ਇੱਕ ਕੋਣ 'ਤੇ ਰੱਖੋ, ਤਾਂ ਜੋ ਪਹੀਏ ਉੱਪਰਲੇ ਅਤੇ ਹੇਠਲੇ ਟਰੈਕਾਂ ਨਾਲ ਇਕਸਾਰ ਹੋਣ।
Once in position, lower the door so that the wheels sit into the tracks. If you’re working with a double sliding screen door, repeat the process for the second door.
ਇਹ ਯਕੀਨੀ ਬਣਾਉਣ ਲਈ ਕਿ ਦਰਵਾਜ਼ਾ ਟਰੈਕ ਦੇ ਨਾਲ-ਨਾਲ ਸੁਚਾਰੂ ਢੰਗ ਨਾਲ ਚੱਲਦਾ ਹੈ, ਸਲਾਈਡਿੰਗ ਮੂਵਮੈਂਟ ਦੀ ਜਾਂਚ ਕਰੋ। ਜੇ ਜ਼ਰੂਰੀ ਹੋਵੇ, ਤਾਂ ਇਹ ਯਕੀਨੀ ਬਣਾਉਣ ਲਈ ਪਹੀਏ ਦੀ ਉਚਾਈ ਨੂੰ ਵਿਵਸਥਿਤ ਕਰੋ ਕਿ ਦਰਵਾਜ਼ਾ ਸਹੀ ਢੰਗ ਨਾਲ ਇਕਸਾਰ ਹੈ ਅਤੇ ਬਿਨਾਂ ਕਿਸੇ ਵਿਰੋਧ ਦੇ ਸਲਾਈਡ ਕਰਦਾ ਹੈ।
-
6.ਟੌਪ ਟ੍ਰੈਕ ਸਥਾਪਤ ਕਰੋ (ਜੇ ਲਾਗੂ ਹੋਵੇ)
ਸਕ੍ਰੀਨ ਵਾਲੇ ਦਰਵਾਜ਼ਿਆਂ ਵਾਲੇ ਕੁਝ ਸਲਾਈਡਿੰਗ ਦਰਵਾਜ਼ੇ ਇੱਕ ਟਾਪ ਟ੍ਰੈਕ ਦੇ ਨਾਲ ਵੀ ਆਉਂਦੇ ਹਨ ਜੋ ਦਰਵਾਜ਼ੇ ਨੂੰ ਸਥਿਰ ਕਰਨ ਅਤੇ ਇਸਨੂੰ ਜਗ੍ਹਾ ਤੋਂ ਹਿੱਲਣ ਤੋਂ ਰੋਕਣ ਵਿੱਚ ਮਦਦ ਕਰਦਾ ਹੈ। ਜੇਕਰ ਤੁਹਾਡੀ ਕਿੱਟ ਵਿੱਚ ਇੱਕ ਟਾਪ ਟ੍ਰੈਕ ਸ਼ਾਮਲ ਹੈ, ਤਾਂ ਇਹਨਾਂ ਕਦਮਾਂ ਦੀ ਪਾਲਣਾ ਕਰੋ:
ਦਰਵਾਜ਼ੇ ਦੇ ਫਰੇਮ ਦੇ ਉੱਪਰਲੇ ਪਾਸੇ ਟਰੈਕ ਰੱਖੋ।
ਪੇਚਾਂ ਨੂੰ ਕਿੱਥੇ ਜਾਣਾ ਚਾਹੀਦਾ ਹੈ, ਉਸ 'ਤੇ ਨਿਸ਼ਾਨ ਲਗਾਓ, ਅਤੇ ਫਿਰ ਛੇਕ ਕਰੋ।
ਟ੍ਰੈਕ ਨੂੰ ਫਰੇਮ ਨਾਲ ਜੋੜੋ, ਇਹ ਯਕੀਨੀ ਬਣਾਉਂਦੇ ਹੋਏ ਕਿ ਇਹ ਹੇਠਲੇ ਟ੍ਰੈਕ ਅਤੇ ਦਰਵਾਜ਼ੇ ਨਾਲ ਸਹੀ ਢੰਗ ਨਾਲ ਇਕਸਾਰ ਹੋਵੇ।
-
7.ਦਰਵਾਜ਼ੇ ਨੂੰ ਐਡਜਸਟ ਅਤੇ ਲੁਬਰੀਕੇਟ ਕਰੋ
ਸੁਚਾਰੂ ਸੰਚਾਲਨ ਨੂੰ ਯਕੀਨੀ ਬਣਾਉਣ ਲਈ, ਤੁਸੀਂ ਪਹੀਆਂ ਨੂੰ ਇੱਕ ਵਾਰ ਫਿਰ ਐਡਜਸਟ ਕਰਨਾ ਚਾਹ ਸਕਦੇ ਹੋ। ਯਕੀਨੀ ਬਣਾਓ ਕਿ ਦਰਵਾਜ਼ਾ ਫਰੇਮ ਵਿੱਚ ਬਰਾਬਰ ਬੈਠਾ ਹੈ।
Check that the sliding door with screen door slides without catching or dragging.
If the door is not sliding as smoothly as you’d like, apply a silicone lubricant to the tracks and wheels to reduce friction and make the movement even smoother.
-
8.ਹੈਂਡਲ ਅਤੇ ਲਾਕ ਇੰਸਟਾਲ ਕਰੋ (ਵਿਕਲਪਿਕ)
ਸਲਾਈਡਿੰਗ ਦਰਵਾਜ਼ਿਆਂ 'ਤੇ ਕੁਝ ਸਕ੍ਰੀਨਾਂ ਵਾਧੂ ਸੁਰੱਖਿਆ ਲਈ ਹੈਂਡਲ ਅਤੇ ਲਾਕ ਦੇ ਨਾਲ ਆਉਂਦੀਆਂ ਹਨ। ਇਹਨਾਂ ਨੂੰ ਸਥਾਪਤ ਕਰਨ ਲਈ:
ਉਸ ਥਾਂ 'ਤੇ ਨਿਸ਼ਾਨ ਲਗਾਓ ਜਿੱਥੇ ਹੈਂਡਲ ਜਾਵੇਗਾ, ਆਮ ਤੌਰ 'ਤੇ ਦਰਵਾਜ਼ੇ ਦੇ ਕੇਂਦਰ ਦੇ ਆਲੇ-ਦੁਆਲੇ।
ਲੋੜੀਂਦੇ ਛੇਕ ਕਰੋ, ਅਤੇ ਹੈਂਡਲ ਨੂੰ ਜਗ੍ਹਾ 'ਤੇ ਪੇਚ ਕਰੋ।
If your door has a lock, install it according to the manufacturer’s instructions.
-
9.ਅੰਤਿਮ ਜਾਂਚਾਂ
ਕੰਮ ਪੂਰਾ ਕਰਨ ਤੋਂ ਪਹਿਲਾਂ, ਇਹ ਯਕੀਨੀ ਬਣਾਉਣ ਲਈ ਇੱਕ ਅੰਤਿਮ ਜਾਂਚ ਕਰੋ ਕਿ ਸਭ ਕੁਝ ਸੁਰੱਖਿਅਤ ਹੈ ਅਤੇ ਸਹੀ ਢੰਗ ਨਾਲ ਕੰਮ ਕਰ ਰਿਹਾ ਹੈ। ਦਰਵਾਜ਼ੇ ਦੀ ਗਤੀ ਦੀ ਜਾਂਚ ਕਰਨ ਲਈ ਕੁਝ ਵਾਰ ਇਸਨੂੰ ਖੋਲ੍ਹੋ ਅਤੇ ਬੰਦ ਕਰੋ। ਯਕੀਨੀ ਬਣਾਓ ਕਿ ਦਰਵਾਜ਼ਾ ਇਕਸਾਰ ਰਹੇ ਅਤੇ ਟਰੈਕ ਤੋਂ ਬਾਹਰ ਨਾ ਖਿਸਕ ਜਾਵੇ।
If your screen on sliding door has a safety latch or stopper, make sure it is in place to prevent the door from coming off the track.
-
10.ਆਪਣੇ ਨਵੇਂ ਸਲਾਈਡਿੰਗ ਸਕ੍ਰੀਨ ਦਰਵਾਜ਼ੇ ਦਾ ਆਨੰਦ ਮਾਣੋ
Once you’ve completed the installation, you can now enjoy the fresh air and the protection from bugs that your new sliding door and screen offers. Make sure to clean the screen regularly to maintain visibility and keep dirt and debris from building up.
ਰੱਖ-ਰਖਾਅ ਲਈ ਸੁਝਾਅ:
ਪਟੜੀਆਂ ਸਾਫ਼ ਕਰੋ: ਧੂੜ ਅਤੇ ਗੰਦਗੀ ਪਟੜੀਆਂ ਵਿੱਚ ਇਕੱਠੀ ਹੋ ਸਕਦੀ ਹੈ ਅਤੇ ਤੁਹਾਡੇ ਦਰਵਾਜ਼ੇ ਨੂੰ ਘੱਟ ਸੁਚਾਰੂ ਢੰਗ ਨਾਲ ਸਲਾਈਡ ਕਰਨ ਦਾ ਕਾਰਨ ਬਣ ਸਕਦੀ ਹੈ। ਵੈਕਿਊਮ ਜਾਂ ਗਿੱਲੇ ਕੱਪੜੇ ਦੀ ਵਰਤੋਂ ਕਰਕੇ ਪਟੜੀਆਂ ਨੂੰ ਨਿਯਮਿਤ ਤੌਰ 'ਤੇ ਸਾਫ਼ ਕਰੋ।
ਸਕਰੀਨ ਦੀ ਜਾਂਚ ਕਰੋ: ਜੇਕਰ ਤੁਹਾਡੀ ਸਕਰੀਨ ਫਟ ਜਾਂਦੀ ਹੈ ਜਾਂ ਖਰਾਬ ਹੋ ਜਾਂਦੀ ਹੈ, ਤਾਂ ਕੀੜਿਆਂ ਤੋਂ ਸੁਰੱਖਿਆ ਬਣਾਈ ਰੱਖਣ ਲਈ ਇਸਦੀ ਮੁਰੰਮਤ ਕਰੋ ਜਾਂ ਇਸਨੂੰ ਬਦਲੋ।
ਟਰੈਕਾਂ ਅਤੇ ਪਹੀਆਂ ਨੂੰ ਲੁਬਰੀਕੇਟ ਕਰੋ: ਟਰੈਕਾਂ ਅਤੇ ਪਹੀਆਂ ਨੂੰ ਸੁਚਾਰੂ ਢੰਗ ਨਾਲ ਕੰਮ ਕਰਦੇ ਰੱਖਣ ਲਈ ਸਮੇਂ-ਸਮੇਂ 'ਤੇ ਸਿਲੀਕੋਨ ਸਪਰੇਅ ਲਗਾਓ।
ਸਿੱਟਾ
Installing a sliding mesh door is an easy and rewarding DIY project that adds comfort to your home by improving airflow and keeping insects out. By following these step-by-step instructions, you'll have a sliding screen door installed in no time. Don’t forget to maintain it regularly to ensure it continues to function smoothly for years to come.
ਉਤਪਾਦ
Latest news
-
Unveiling the Allure and Practicality of Classic Mosquito Nets
ਖ਼ਬਰਾਂJul.04,2025 -
Unraveling the World of Mosquito Nets: Varieties, Costs, and Production
ਖ਼ਬਰਾਂJul.04,2025 -
Redefining Protection and Style: The World of Mosquito Nets
ਖ਼ਬਰਾਂJul.04,2025 -
Enhancing Sleep and Style with Contemporary Mosquito Nets
ਖ਼ਬਰਾਂJul.04,2025 -
Diverse Solutions in Mosquito Netting: Sizes, Varieties, and Flexibility
ਖ਼ਬਰਾਂJul.04,2025 -
Deciphering Mosquito Nets: Significance, Varieties, and Applications
ਖ਼ਬਰਾਂJul.04,2025 -
Transforming Bedrooms into Mosquito - Free Havens
ਖ਼ਬਰਾਂJul.01,2025


